
Just over a week ago I posted a prologue to today’s garapa paneled bathroom update. I apologize if it felt a little half baked.
For just a little longer, I’ll keep you in suspense before I share photos of the now completed garapa installation. Remember, anticipation is half the pleasure! (Source: Garapa Paneled Bathroom, Pt. 1)
I wasn’t teasing out the update for the sake of suspense. I promise. And today’s post will hopefully offer some recompense for your patience. But there was a lot — a LOT — to pack into a single post, so I felt it more reasonable to subdivide it into a couple of installments.
I’m dividing this… update into two posts to fairly review and showcase a project that has taken the better part of a year from beginning to finish… (Source: Garapa Paneled Bathroom, Pt. 1)
Besides, I was about to head into the Gila Wilderness when Eric Crowningshield gave me the good news, and I simply couldn’t squeeze it all in before going off-line adventuring for a week sans connectivity, computer, etc.
But now it’s time to celebrate completion of the icehouse bathroom’s garapa paneling, to showcase the photos, and to sing praises for the carpenter behind this monumental accomplishment.
Garapa Paneling the Bathroom
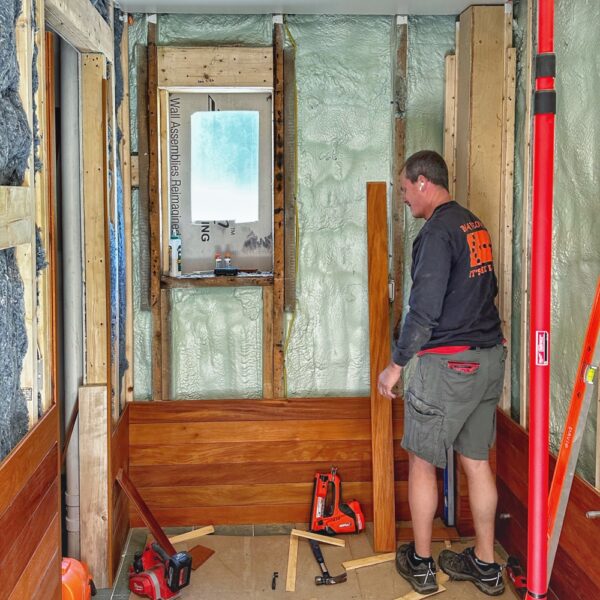
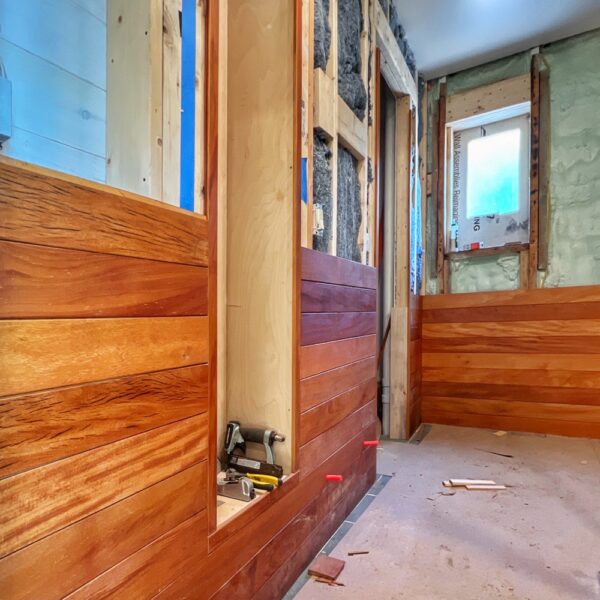
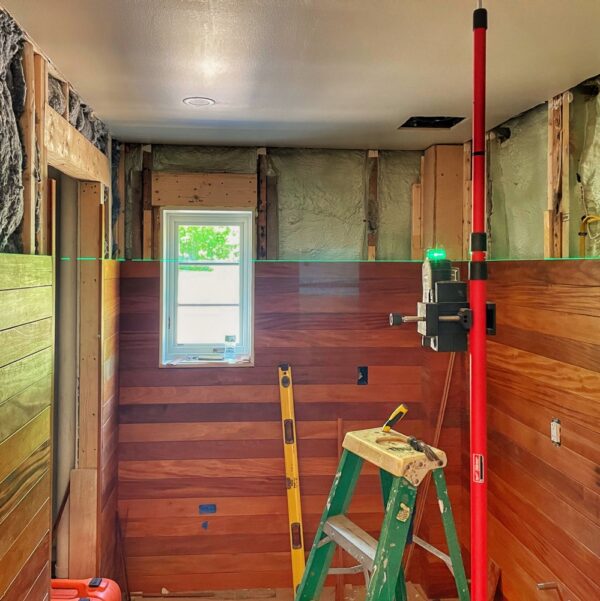
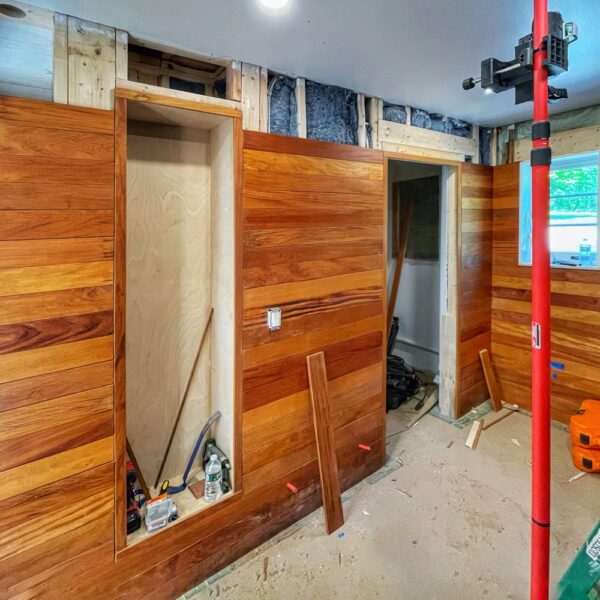
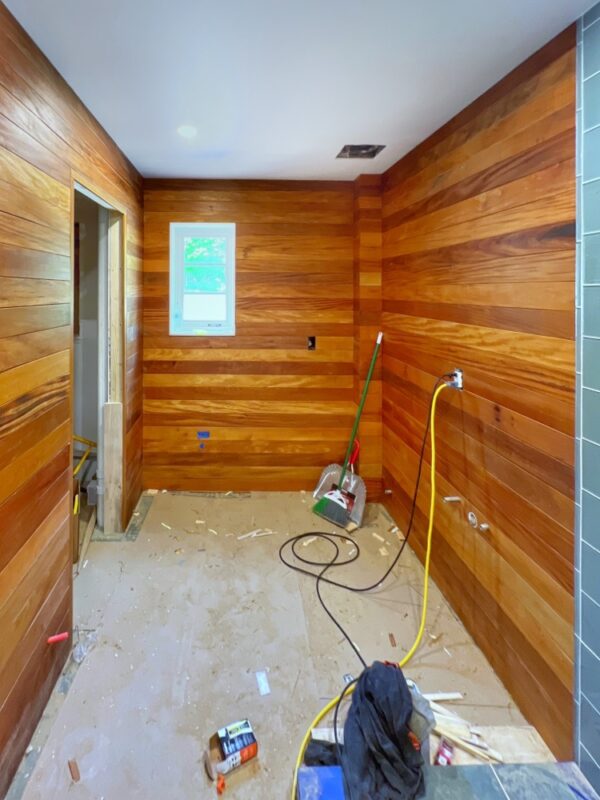
Upcycling Rosslyn’s deconstructed garapa decking into interior paneling has occupied many members of the icehouse rehab team for months. It’s been a challenge. Every. Single. Step. From demo’ing the old deck (while painstakingly deconstructing, selecting, and grading the most reusable and aesthetically pleasing garapa) to troubleshooting, iterating, and finally re-fabricating the decrepit, timeworn decking into elegant interior finish material, this upcycling endeavor has been an epic quest. And the exacting preparation demanded even more exacting installation.
Today we celebrate Eric’s conscientious carpentry and dogged determination, shepherding the garapa paneling to its exquisite completion! (It’s worth noting that Matt Sayward assisted in the early stages of installation, but Eric soon took ownership of the project to ensure 100% consistency.)
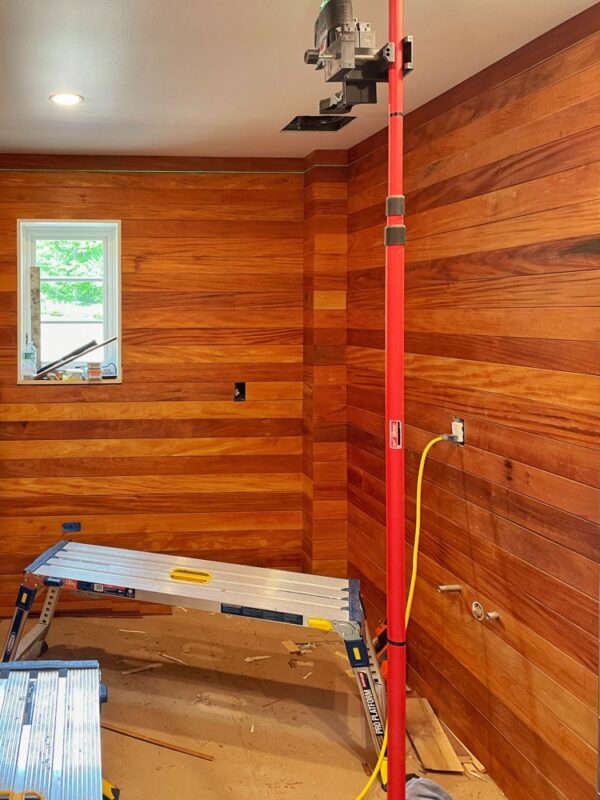
The following excerpts and photos offer an interesting perspective as Eric worked through installation of the garapa paneling.
It should go a little quicker now with the breaks in the runs [and] not needing to lineup 4 miters in one location. Nothing about this is easy but my gosh probably one of the most rewarding project thus far… — Eric Crowningshield
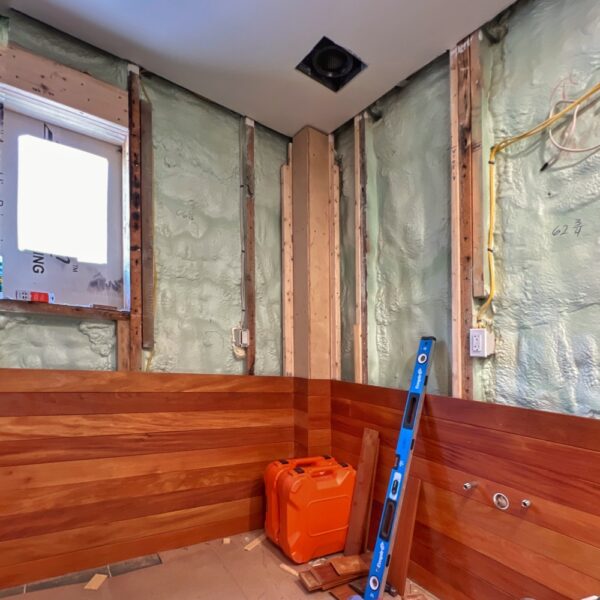
On the left side of this door it is 3-1/8” from the inside of the door jam to the tile. Do we not put garapa and run a 3” trim around the jam leaving a 1/8” reveal? On the other side we only have about 2”, so I’m guessing it may look odd with wider trim on the left and top. — Eric Crowningshield
The best way to handle the garapa around the door is difficult to determine from afar. My suggestion is that you and Peter look at it together and come up with the best solution. We have some asymmetry to deal with. Tricky. — Geo Davis
I’m going to put horizontal pieces on the left side before trim because the trim on the other side is around 1 3/4” so I think it would look better keeping the same size around the door. — Eric Crowningshield
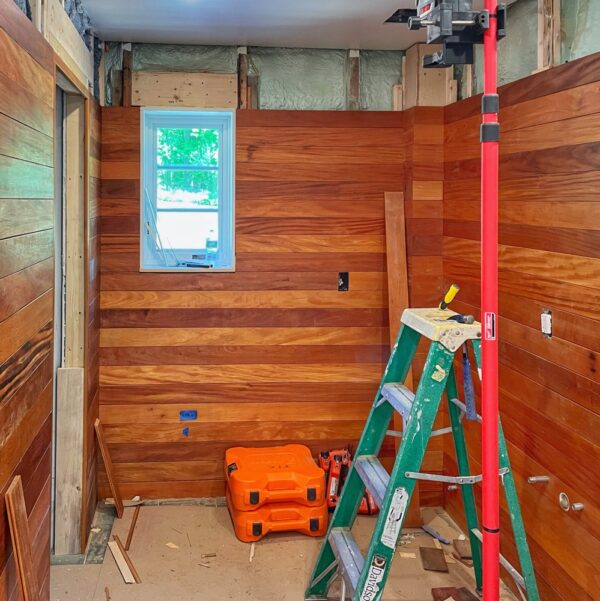
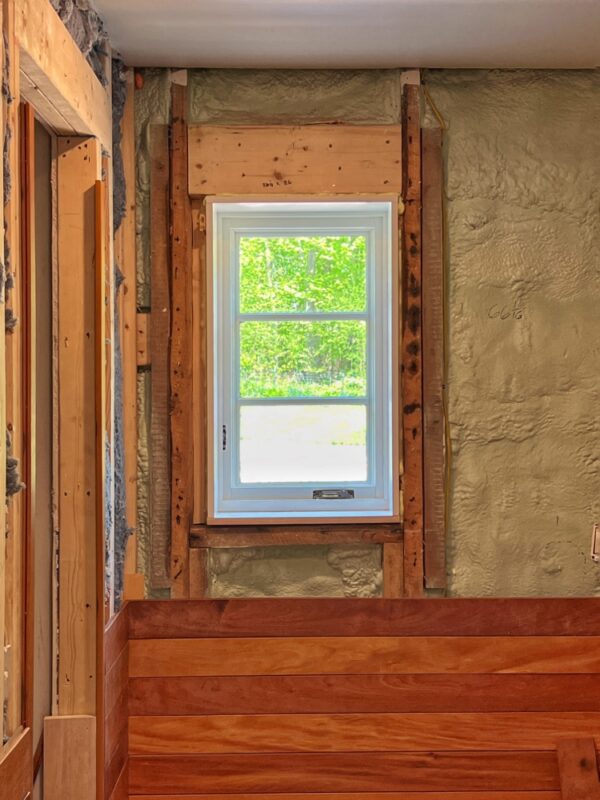
I went down tonight for a few hours and ripped some [garapa] down to the same width so the last 4 rows will be the same. Otherwise we were going to end up with a 1” or so piece around the ceiling. I put another row of that up so only 3 rows left. — Eric Crowningshield
How much did you have to takeoff of each of the boards for the last four courses? Or, better question, how different will they be from the rest of the words? — Geo Davis
About 3/8 of an inch. The boards I put up throughout the whole wall ranged from 4” down to 3-5/8” and a few at 3-1/2”. I had 13” left so I was doing 3-1/4” for the last 4 rows. — Eric Crowningshield
It is completed!!! I love saying that. — Eric Crowningshield
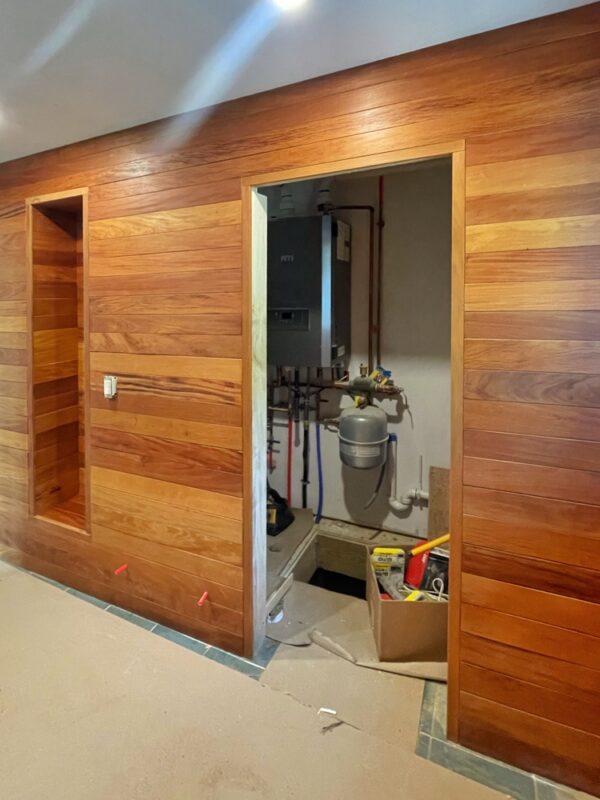
Superb! Congratulations, Erik. It really looks amazing. I hope you’re proud of the results. I know this has been an almost endless process from demoing the deck to installing the paneling, but a worthwhile adventure. Well done. Is everything wrapped up around the door as well? — Geo Davis
No, we are going to adjust the casing so it is the same size trim on each side. Yes, super excited about it and everything it means to you and the story behind it all! — Eric Crowningshield
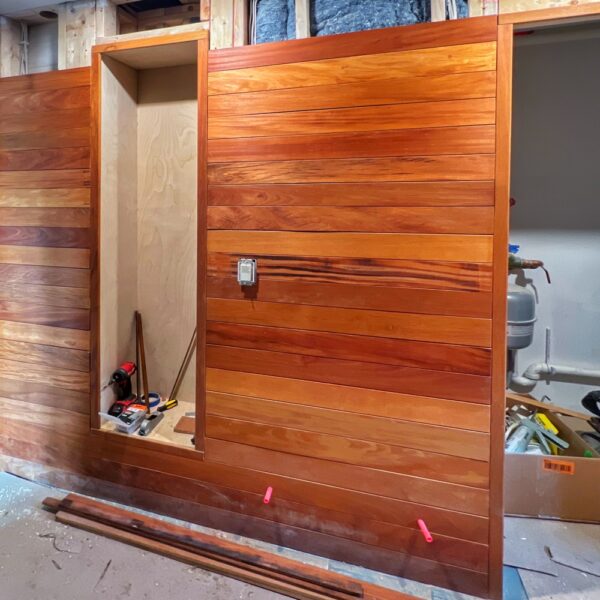
Bravo, Eric Crowningshield, for completing installation of the glorious garapa paneling in the icehouse bathroom. What a tour de force! It’s hard to believe that this is the same decking your team deconstructed from Rosslyn’s deck a year ago. Many months of brainstorming, experimenting, re-milling, oiling, and installing later this masterpiece is born. Hurrah! — Geo Davis
It was a task for sure, but the end result more than makes it worth the struggles. It is a must see in person although the pictures capture how amazing it looks, [though] it’s even more impressive in person! — Eric Crowningshield
I forgot to tell you. I found one board with plugs still in it, so if you look close it is about midway up the wall between the utility and niche. A couple small ones in the niche as well. I thought that would be pretty cool to help tell the story about it being old decking. Wish I found more. — Eric Crowningshield

Thanks for letting me know. I will hunt for them next time I’m back. Although you should’ve left it to see if I noticed! — Geo Davis
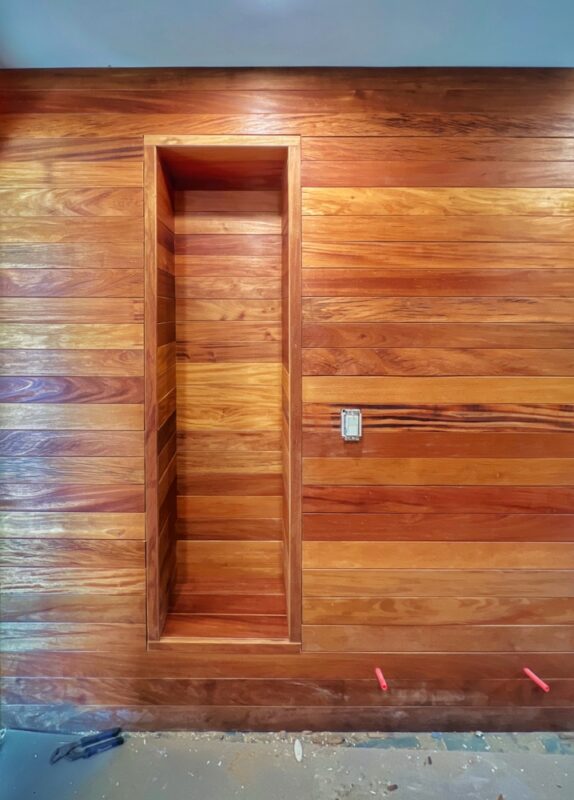
This subtle upcycling/repurposing souvenir isn’t quite discernible in the photo above, but it thrills me. Can’t wait to inspect in person!
I look forward to sharing more photographs of the icehouse bathroom as it approaches completion. It’s so close… Until then, I’d like to express my profound gratitude to Eric for transforming this vision into reality. What an extraordinary accomplishment!
Leave a Reply